Hobbies & Collectibles / Guides & How-To’s
AK Crackle Effects Not Cracking? A Miniature Basing Guide
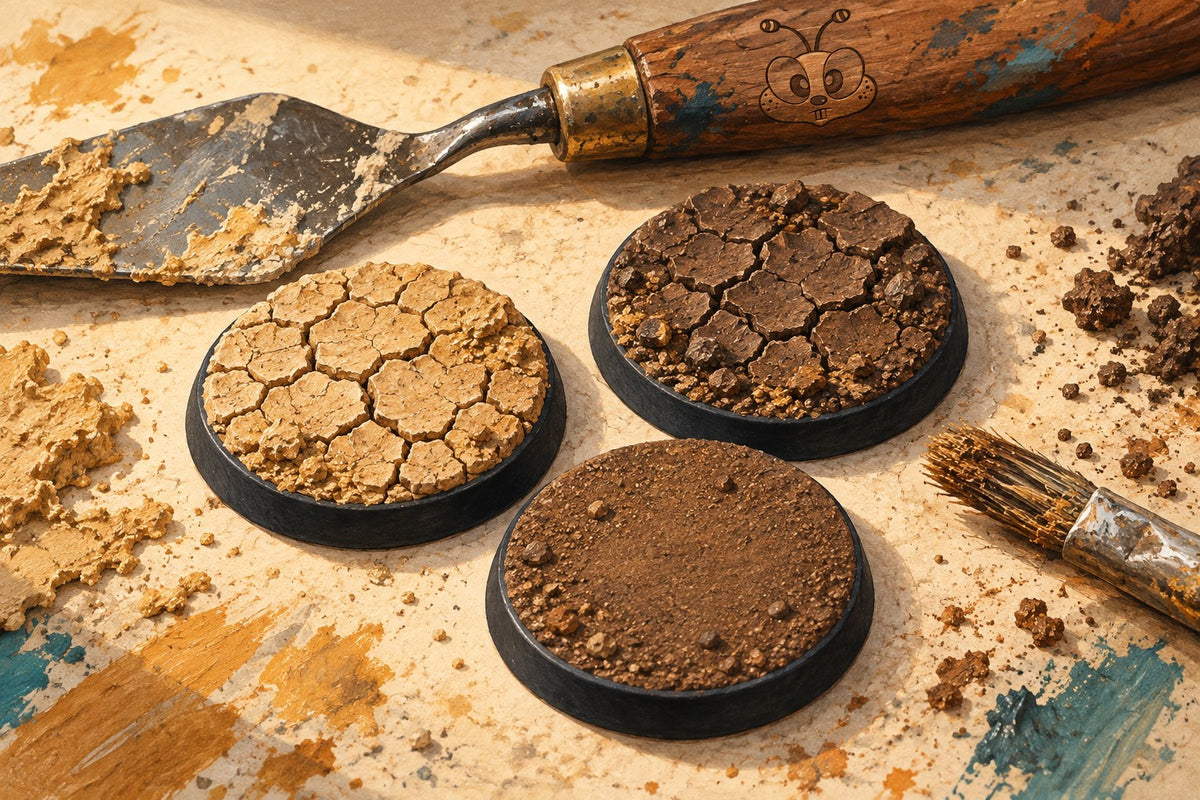
If your AK Crackle Effects stays smooth, start by checking the base surface and the application—not by adding another thick coat. Begin with a thin layer over an acrylic base, let it dry, then compare a second sample with just one change. That gives you a useful next step without gambling on a finished miniature.
Cracked earth can turn a plain base into a dried riverbed, a dusty battlefield or a patch of weathered ground. The frustrating part is getting a result you can repeat. A small sample is worth making before you commit a whole squad, especially when you are choosing between Light & Dry and Wet Crackle Effects.
01 / Choose the ground
Light & Dry or Wet Crackle Effects?
Light & Dry is the starting point for pale, dry cracked soil. Wet Crackle Effects is intended for a damp-ground appearance, including groundwork and lower vehicle surfaces. Choose the finish that belongs in your scene; “wet” describes the effect you are trying to represent.
| Your scene | Start with | Composition idea |
|---|---|---|
| Pale, dried ground | Light & Dry | A cracked patch beside stones or dusty soil. |
| Damp, fractured ground | Wet Crackle | A smaller patch near a vehicle or muddy edge. |
| Raised banks or deep ruts | Build the ground shape first | Reserve crackle for selected surface areas. |

Both options are available in the AK Crackle Effects range. For a dry-earth project, choose Light & Dry; for damp cracked ground, choose Wet Crackle.
You do not need every finish to begin. Pick the scene first, buy the matching effect, and keep the rest of the base simple while you learn how that combination behaves.
02 / A small bench plan
Make a comparison you can actually learn from
Use spare bases or offcuts of the same material as your project. Label the underside before starting. Keep the paint underneath, the application tool and the drying location consistent so a change in the result means something.
Your starting sample
A thin application over your prepared acrylic base. Let it dry undisturbed.
Change one thing
Repeat the same preparation with a modest change in layer thickness.
Repeat the winner
Reproduce the better result before moving onto the finished project.
This is a planning method, not a requirement to use three different products. You are looking for a repeatable surface that suits the model's scale. Huge islands of cracked earth may look dramatic in a close-up but overwhelm a small figure.
Write down four useful details
- The material and acrylic coating underneath.
- The crackle finish you used.
- How you spread it: a light skim or a fuller layer.
- What the surface looks like after it has dried.
A quick photo beside an unpainted spare base can help you compare the texture later. Keep the successful sample with your paints so the next group of miniatures can share the same ground treatment.
Change the recipe, not the whole bench
Changing the undercoat, thickness and drying method together leaves you guessing which change helped. Keep one sample as your reference and alter one variable at a time.
03 / Read the surface
What to try when the result looks wrong
The surface has dried without visible cracks
Check what is underneath and how the layer was applied. Return to a small sample over an acrylic base with a thin application, then compare a controlled thickness change. If you originally applied the effect directly to bare plastic or a different surface, do not assume that result predicts how the prepared sample will behave.
Avoid piling more material onto the failed area while you are still diagnosing it. Work out a repeatable combination on a spare piece first.
The cracks look too large for the miniature
Compare a lighter application on the next sample and judge it beside the figure at normal viewing distance. You can also use a smaller patch of crackle within a larger area of ordinary ground texture. The base does not need to be cracked from edge to edge.
The effect lifts or breaks away
Separate the cracking pattern from the attachment problem. Keep the finished model aside and inspect a spare sample: is only the crackle lifting, or is the coating underneath coming away too? Record the underlying material and coating before changing the recipe. Do not build further paint layers over a loose surface.
I want a guaranteed drying time
Plan around the actual sample rather than a fixed countdown. Leave it undisturbed and allow the applied layer to dry before assessing the pattern or adding a finish. Give yourself time for a second sample when preparing a display piece or a gift project.
Keep the first comparison simple and let it dry naturally. Introducing accelerated drying at the same time as a new thickness makes it harder to understand the result.
04 / Turn the sample into a scene
Buy for the surface you want to build
For a pale dried riverbed or a sun-baked patch of ground, start with Light & Dry Crackle Effects. For damp-looking fractured ground, start with Wet Crackle Effects. In either case, keep a spare base and an application tool ready for the first sample.
If your plan needs hills, banks or substantial ruts, sketch those shapes before choosing the surface effect. A jar of crackle should have a clear job in the project. Place it where you want fractured ground, then leave room for stones, smoother soil or the miniature's feet.
For a tabletop army, a small repeatable recipe is usually easier to carry across many bases than a different elaborate scene under every figure. For a display piece, you can concentrate the cracked patch near the focal point and let quieter ground surround it.
The battlefield basing ideas guide can help you choose the surrounding terrain. Once the first sample works, write down the combination and build from that result. The aim is a base you can repeat with confidence—not a shelf of effects bought to solve the same uncertain step.