Home & Kitchen / Guides & How-To’s
How to Measure a Drawer for Organizers Before You Buy
A better-organized drawer starts with three measurements. Check the usable space, compare tray and compartment sizes, and try a paper layout before buying organizers.
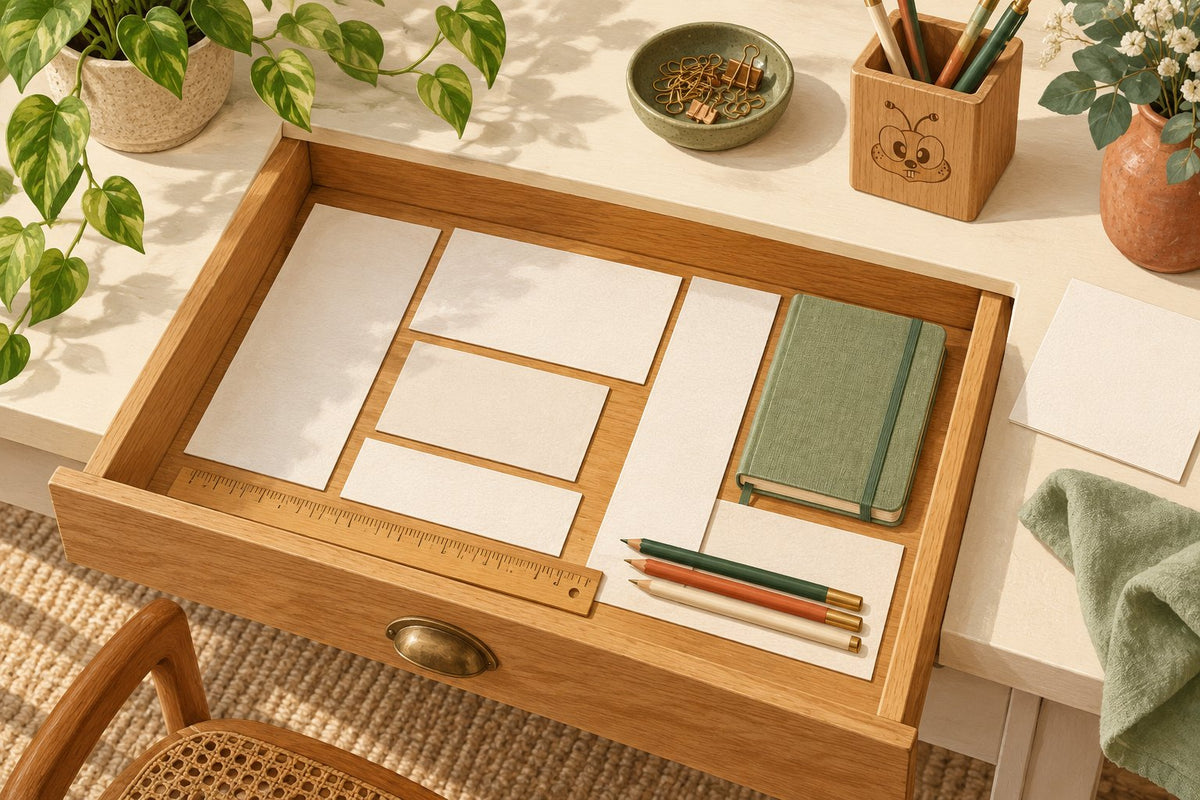
Measure the inside of the drawer, then check how much height you have when it closes. Compare that usable space with the organizer’s outside dimensions—not just the size of its compartments. A paper layout helps you try the arrangement before committing to a set.
A drawer can look wonderfully organized in a photo and still be awkward to use at home. The tray fits, but the spatula doesn’t. The little bins line up, but a whisk catches when you close it. Getting the measurements right saves you from designing a drawer around organizers that almost work.
Start with one drawer and the things you actually want to keep in it. You’ll need a tape measure or ruler, paper and a pencil. There’s no need to buy anything for this first pass.
Measure the space you can actually use
Empty the drawer and decide which items belong there before measuring. Set aside duplicates and anything that would be easier to reach somewhere else. Then record these three dimensions in one consistent unit.
Width
Measure left to right inside the drawer. Check near the front, middle and back.
Depth
Measure from the inside front to the inside back. Check both sides and the center.
Closing height
Check the available vertical space along the drawer’s travel, including anything hanging above it.
Use the smallest usable width and depth you find. A sloping side, rounded corner or projecting screw can make the floor smaller than the space near the top. Sketch those interruptions rather than treating the drawer as a perfect rectangle.
The decorative drawer front and the cabinet’s advertised width won’t tell you whether a tray fits inside. If you’re adding a liner, account for its thickness and take your final measurements with it in place.
Check height with the drawer closing
The height of the drawer’s side wall isn’t always the limit. A rail, cabinet frame or the underside of the drawer above may leave less clearance somewhere along the way. An organizer can sit inside an open drawer perfectly and still prevent it from closing.
Think about the loaded organizer, too. A whisk, stacked utensils or a brush handle may stand taller than its tray. Keep those shapes in mind when choosing the organizer’s height and when planning which items will lie flat.
Move the drawer slowly while checking visible clearance. Keep fingers clear of runners and pinch points, and stop if anything catches; don’t force it shut. If you can’t see an obstruction safely, follow the furniture maker’s guidance rather than reaching blindly into the mechanism.
Also check whether a large one-piece tray can be lowered into place. A drawer that doesn’t pull all the way out may have enough room at the bottom but too little access through the opening.
Read two different sets of organizer dimensions
Outside dimensions tell you whether the organizer fits the drawer. Inside compartment dimensions tell you whether your things fit the organizer. Both matter.
A tray described as 12 inches long may have a shorter usable compartment once its end walls are included. Measure your longest everyday item—a serving spoon, makeup brush or pair of scissors—and compare it with the compartment you plan to use. Leave room to lift it out comfortably.
A quick fit example
Imagine a drawer with 14 inches of usable width. Two trays that are each 6½ inches wide on the outside total 13 inches, leaving 1 inch across the drawer before you decide where the gaps go. Two 7-inch trays total exactly 14 inches and leave no allowance for variation, corners or placement.
That arithmetic checks the footprint only. You still need to check depth, closing height and the manufacturer’s recommended fitting clearance.
There isn’t one clearance allowance that works for every organizer. Ready-made trays, expanding dividers and custom inserts fit differently. Follow the specific sizing instructions; if a listing doesn’t say whether its measurements are internal or external, resolve that before ordering.
Try the arrangement on paper
This is the fun part: you can move everything around without unpacking a box of organizers.
- Draw the drawer’s usable footprint. Tape paper together if needed, mark the front edge and include any corners or obstructions that steal space.
- Make a paper footprint for each candidate tray. Use its outside width and depth, and label it so similar sizes don’t get mixed up.
- Arrange the footprints inside your outline. Keep frequently used items near the front and leave an open area if a bulky tool works better without a compartment.
- Place your actual items over the plan. Check the proposed compartment measurements separately, then consider how you’ll pick each item up.

A paper plan tests the layout, not the finished tray. It doesn’t recreate thick walls, curved corners or height. Use it to rule out awkward arrangements, then make the final fit check against the product dimensions.
Choose the organizer shape after the layout
A single compartment tray suits a collection that already fits its layout, such as everyday cutlery. Check the long compartments first; they’re often the deciding factor.
Separate bins let you mix long and short spaces for a desk, makeup drawer or miscellaneous household items. Add up the outside dimensions of the bins placed side by side. A set’s total piece count tells you very little about whether the arrangement will work.
Expandable dividers can create long lanes without covering the whole drawer floor. Check the supported expansion range, divider height and how the ends attach or press against the drawer. Don’t assume a divider fits just because its maximum length exceeds your measurement.
You don’t need to fill every inch. A little open space can make a drawer easier to use, especially for an item whose shape never quite suits a tray.
Your before-you-buy measurement note
Save this short checklist with your drawer photo so the measurements are handy when you shop.
- Smallest usable inside width: _____
- Smallest usable inside depth: _____
- Available closing height and obstructions: _____
- Longest or tallest item to accommodate: _____
- Organizer outside dimensions and fitting allowance: _____
- Usable compartment dimensions checked: _____
- Room to insert the organizer and lift items out: _____
Once the organizers arrive, try them in the empty drawer first. Then add your everyday items and check that the drawer opens and closes freely. The best arrangement is the one that makes putting things away feel easy—not the one that uses the most trays.
For another small project when you’re ready, browse The Daily Find.